I am hosting at my yahoo scrapbooking group for the month of October. I am giving the group a sketch and the measurements for a card. I will show the step by step here in my blog and the links to the freebies. I will have 3 different versions using the same sketch but with a digital stamp, cricut diecut or just a sentiment. For my card i've gone w/the "Victorian" look.

 Let's get started...
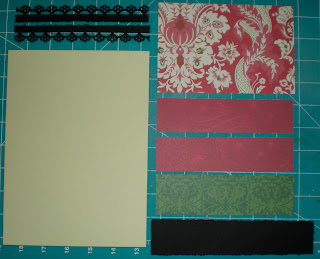
What you will need:
Card base- 8.50 x 6.25"
First layer- 4 x 6"
(2) 6 x 1.5" red strips
6 x 1.75" green strip
(2) 6" black border strips
7 x 1.75" black strip
2" green stripe circle
2.75" black scallop circle
Christmas Cheer Sentiment (freebie from online)
*Digital image, diecut or sentiment only
Free dog image here
Hannah Montana Disney cart for Butterfly version
Christmas ribbon for sentiment version

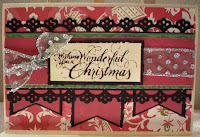
First step, put first layer (patterned paper) on card base. Mat one red strip onto green paper, attach border pieces as shown:

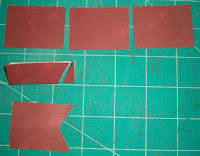
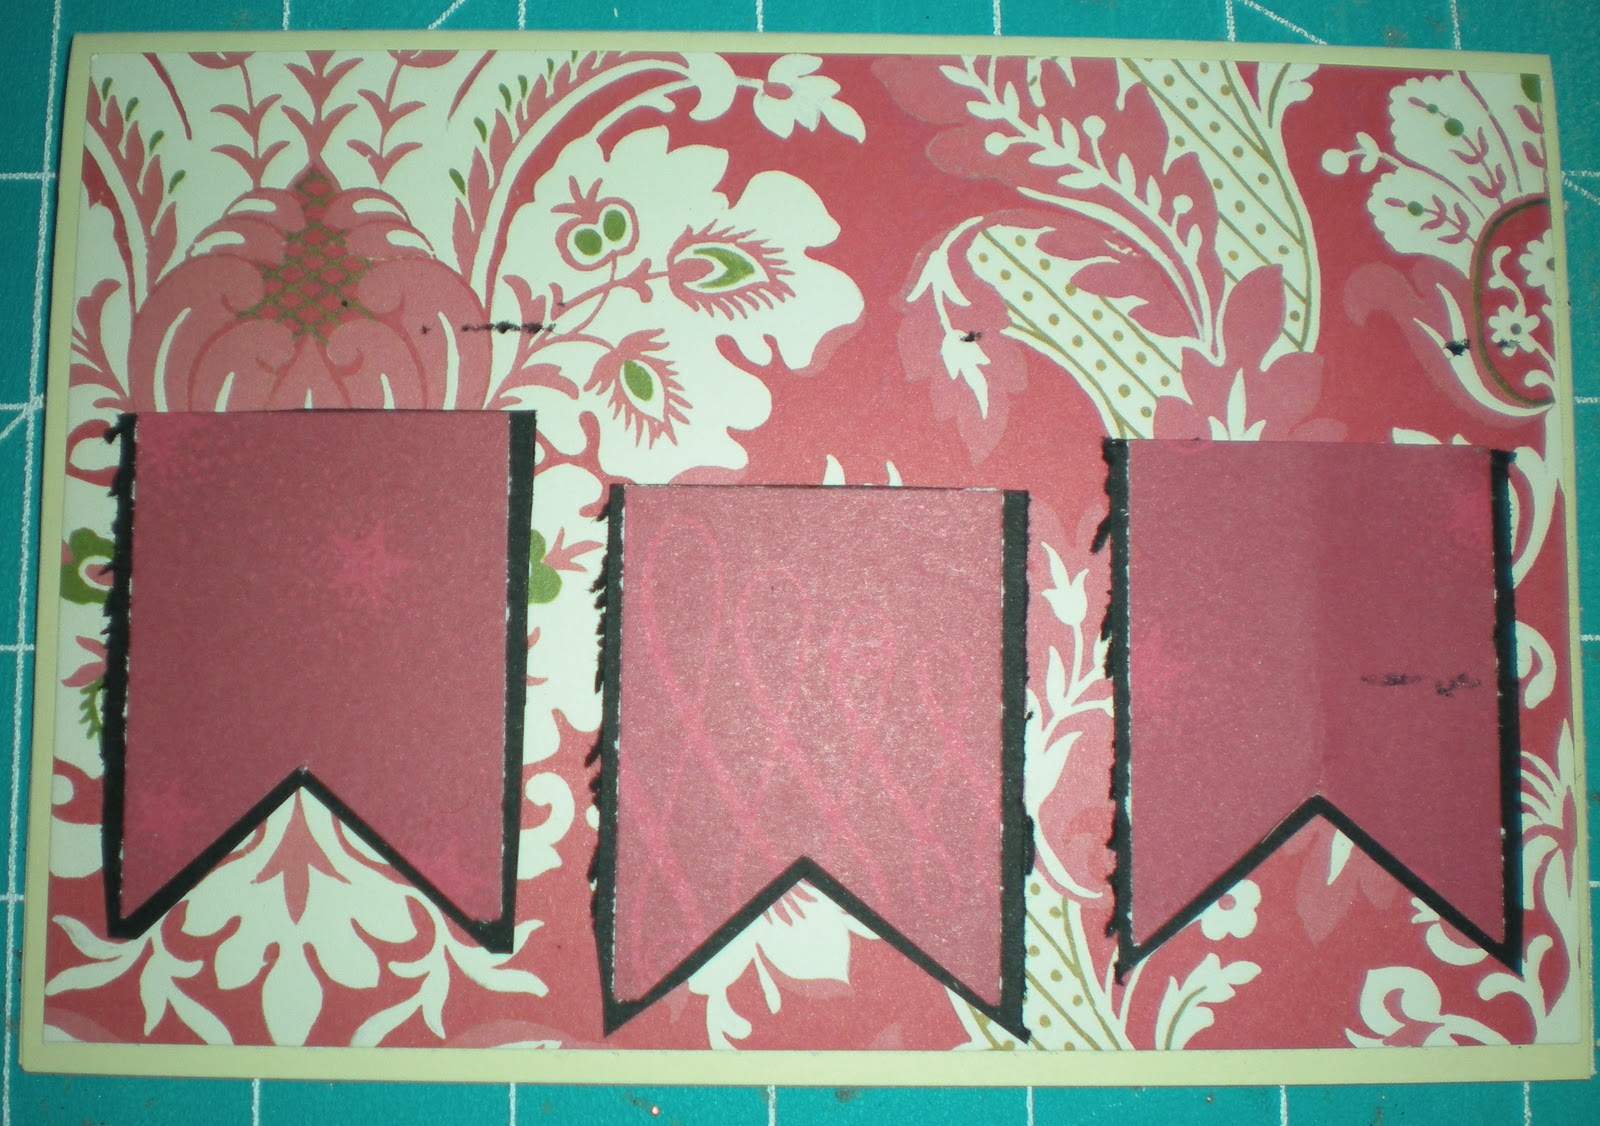
Cut second red strip into 3 equal pieces (2 x 1.5"), fold in half long ways and snip off triangle to make the ribbon points as shown. Mat all three pieces and hand cut around. Place "ribbon paper strips"on card front to your liking and adhere.


Place matted strip over the "ribbon strips" as shown. Adhere green stripe circle to black scallop circle and adhere to card.

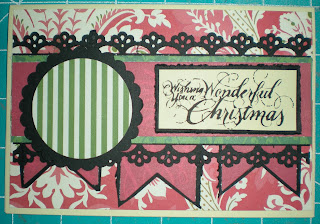
Add, digital image, diecut or just sentiment. See other versions in my second post. To make this freebie sentiment go here and download this font. Type the letter "q" in your word program and this sentiment will show up. To enlarge your "font" to the size i used type in 100.

Challenges:

 Let's get started...
What you will need:
Card base- 8.50 x 6.25"
First layer- 4 x 6"
(2) 6 x 1.5" red strips
6 x 1.75" green strip
(2) 6" black border strips
7 x 1.75" black strip
2" green stripe circle
2.75" black scallop circle
Christmas Cheer Sentiment (freebie from online)
*Digital image, diecut or sentiment only
Free dog image here
Hannah Montana Disney cart for Butterfly version
Christmas ribbon for sentiment version

First step, put first layer (patterned paper) on card base. Mat one red strip onto green paper, attach border pieces as shown:

Cut second red strip into 3 equal pieces (2 x 1.5"), fold in half long ways and snip off triangle to make the ribbon points as shown. Mat all three pieces and hand cut around. Place "ribbon paper strips"on card front to your liking and adhere.


Place matted strip over the "ribbon strips" as shown. Adhere green stripe circle to black scallop circle and adhere to card.


Add, digital image, diecut or just sentiment. See other versions in my second post. To make this freebie sentiment go here and download this font. Type the letter "q" in your word program and this sentiment will show up. To enlarge your "font" to the size i used type in 100.


Challenges:
Holy smokes, Bonnie! What a fab job you did and love how you gave like a mini tutorial! Gee, Christmas is closer than we think!
ReplyDeleteCindy Porter